Deploying a virtual machine based on a generalized custom image using the Azure Portal
In this blog post we are showing quickly how to deploy a VM in Azure from a custom image using the Azure Portal.
Quick steps to deploy a custom VM image from Azure Portal
This blog post is an updated version of my previous post Deploying a virtual machine based on a generalized custom image using the Azure Portal
Locating the Images service
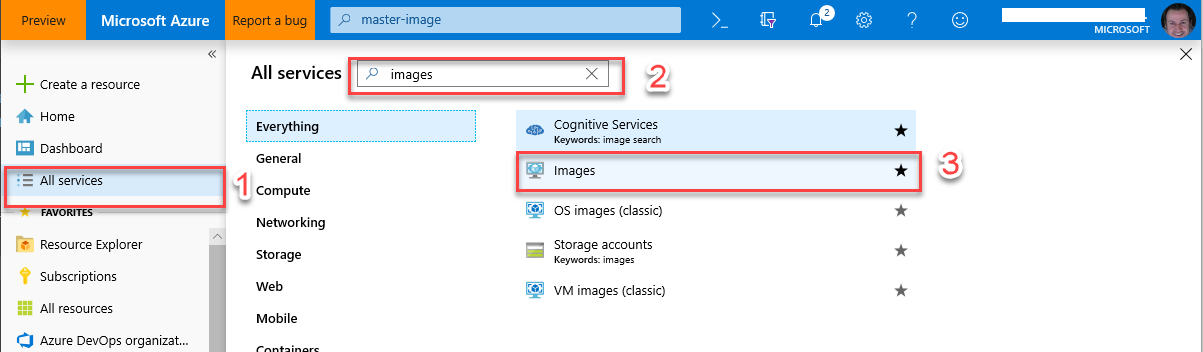
- Open Azure Portal and click “All services” in the left-hand side.
- Within “All services” search text box, type “images”
- Click on “Images” icon from the search result (Optionally, you can click the star icon next to Images item to make it available in the left navigation pane)
Deploying a VM from the custom managed image
-
With the “Images” blade opened, click the custom image you want to create a new VM from

-
Click “+ Create VM” button in the
<your custom image name>blade to deploy your new VM. If you included data disks before capturing the image you will notice the empty slots for data disks, this means that when your VM is deployed from this custom image it will have that number of new empty data disks attached to it. If you want these disks to be automatically configured as a raid 0 volume within your Linux Vm please refer to Automating raid0 MDADM volume creation on a Linux VM when using a custom image in Azure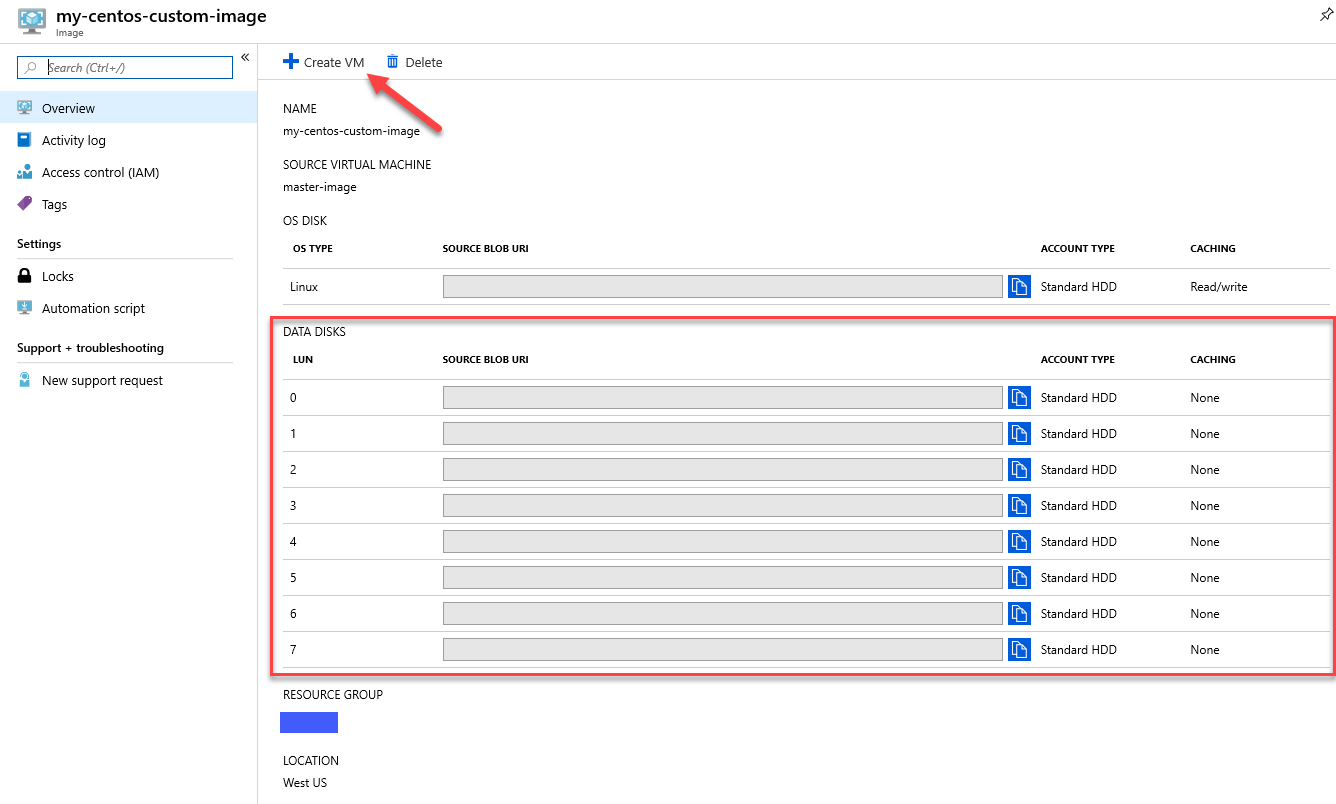
-
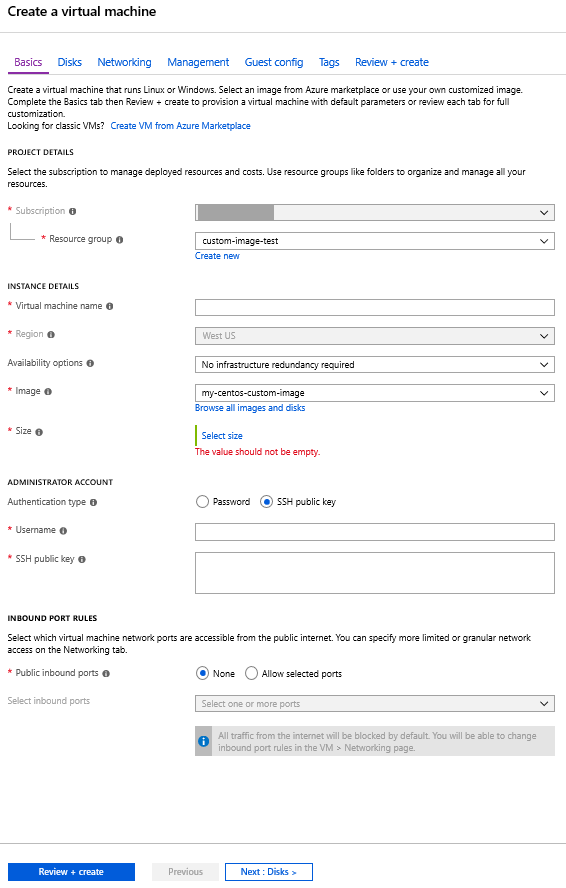
Follow next steps as you would normally do when creating a VM from the marketplace in the “Create a virtual machine” blade.